Teaching Philosophy

I feel successful when I teach people:

- to see what they look at!

- that it is ok to be different!

- to open a whole new world of creativity for them....

- that there is a solution for every problem (mostly with a quick-unpick!)

- that it is a joy to be creative......


The Creative Mind Plays with the Object it Loves -
Carl Jung


Sunday, 1 February 2015

25

A bit late, but a happy 2015 to all the readers of this blog.   Yes, I took time off to rest as this year promises to be very busy with exciting events for me.   More about that at a later stage.

In 2011, our local Dias Quilters' Guild celebrated their 25th birthday.   To celebrate this, there was a Guild challenge to make a piece depicting "25"!   When I first heard about this challenge, I wondered what on earth to create...   As I was sitting at the Guild meeting listening to the speaker, my eyes caught my bangle and immediately I got excited, all within minutes.   Willem gave me this bangle on our 25th wedding anniversary in 2006 and as it was our 34th wedding anniversary yesterday, I thought it a good time to share...

Silver, freshwater pearl and gemstone bangle, inspiration for my interpretation of 25.

Back to the bangle.    At the time I was so caught up with other projects that I did not have time to transform my idea into a project.   I normally make rough sketches of ideas, some ideas are good, others not.   Somehow this sketch kept popping up in my mind and begged to be made.

Rough sketch for 25

I loved the concept and decided to make a cushion cover instead of a quilt as I needed new scatter cushions.  A background of fused horizontal strips in neutral shades was prepared, grading the fabrics from light to medium shades.    I selected a variety of rusty browns and greys for the diagonal shapes (the pearls) and fused it onto the background.  A variety of colours in silk was used for the round shapes (gemstones) and fused into position.   Only the strips were carefully cut as the base fabric had to be covered.   The rectangular and round shapes were cut freehand as I wanted it to look a bit uneven like the silver casings moulded around the pearls and gemstones of the bangle.

I used a feather stitch on the sewing machine to join the strips and the shapes were stitched using the free motion raw edge applique technique in a variety of variegated threads.

25 completed in 2014

Close-up of the stitching of 25

At the moment I'm working on a very special exhibition, more about that at a later stage....   Until then, happy stitching!

Sunday, 12 October 2014

The Core

October is almost halfway and hopefully I can now come up for some air.   I've been extremely busy with teaching and other quilting related commitments and in the process, the blog gets put on the "don't have time now"...

The past week we had our annual Spring Show at the Dias Quilters' Guild in Port Elizabeth and as always, the Committee did a sterling job with setting up a lovely display.   Lots of people came to see the lovely quilts etc made by our members and there was a lovey buzz of excitement.

My friend Yolande Bowman of the Pied Piper Quilt Shop in Port Elizabeth and myself had a wonderful idea in 2011 to spice up our annual Shows by challenging quilters to be more creative.   We formulate an invitational creative challenge and these pieces are then displayed as a satellite exhibition at the annual Spring Show of our Guild.   It is amazing to see the progress, creative energy and flair of these exhibitions.

This year we had the third challenge, Shape It!   The concept was to choose a shape as primary design element e.g. square, rectangle, circle, triangle, hexagon, diamond, trapezium, octagon etc.   Other shapes could be incorporated as secondary design elements but the overall impression had to reflect the primary shape.   There was also size restrictions and the format would be of a skinny quilt.

I plan to make a scrap quilt of Willem's old ties as he retires from work at the end of the year and as I was unpicking these, I was fascinated by the different textures of the inners.  I decided not to discard it as I could use it at some stage...    When I planned my Shape It piece, I decided to use these inners to prepare a foundation for the shapes.   I chose a ring as my primary design element and chose a rust and purple palette.    As I started cutting rings in various sizes, I realized that one of my favourite pieces of Bali prints also had a strong tinge of magenta in it and decided that it really was the zinger the piece needed.

I roughly stitched the inners to the base fabric to keep it in position, but it was rather puffy and I had to make a plan.   I started free motion stitching to get the feel of the piece and loved it from the first stitch.   In the process, I found recycled silk strips in the same natural hues as the tie inners in my cupboards...  Some pieces had little bits of black designs printed on it and I stitched these down onto the inners - the silk was very delicate and perfect for the effect I wanted.   The next step was to fuse the rings down onto the background - the various sizes and colours were scattered randomly to ensure that balance was created and was then stitched using free motion stitching.    As I have a punching tool for my Bernina sewing machine, I filled the insides (cores) of the rings by needlepunching all sorts of wools, yarns and commercial felt into the insides of the rings.   It created beautiful texture.    As the background for the rings were all natural shades, it looked rather light and needed a border to contain it.   As I have various pieces of fabric which I previously discharged, I used some of it for the side borders as the colours were perfect for the project. The recycled silk strips also had pieces of rust, magenta and black and I prepared a strippy top and bottom section using these.   I also added snippets of these to hide joins in the side sections.    

The Core 2014 - detail of the rings, stitching on the tie inners and border sections.


As I used the pointed sections of the tie inners, the bottom section of the foundation section was irregular which provided an interesting line.   I made loose rings which I hung from the bottom section, resting on the lower silk panel like beads.   That way I used the design shape throughout the piece and filled the otherwise unused space on the bottom section which provided the necessary balance.

Bottom section of The Core


The Core 2014
It is amazing how easy some pieces fall into place, with others one have to do major battle...   With The Core, everything just worked and I loved the process... The more I look at it, the more I like it...

Artist Statement for The Core:
Exteriors can be deceiving as it does not show what is inside...    These unseen inner elements give us shape, structure, foundation and stability.  It defines and contains us - gives us shape and direction, the core of our existence as it defines all aspects of our lives..!    


Sunday, 31 August 2014

Unity from Within

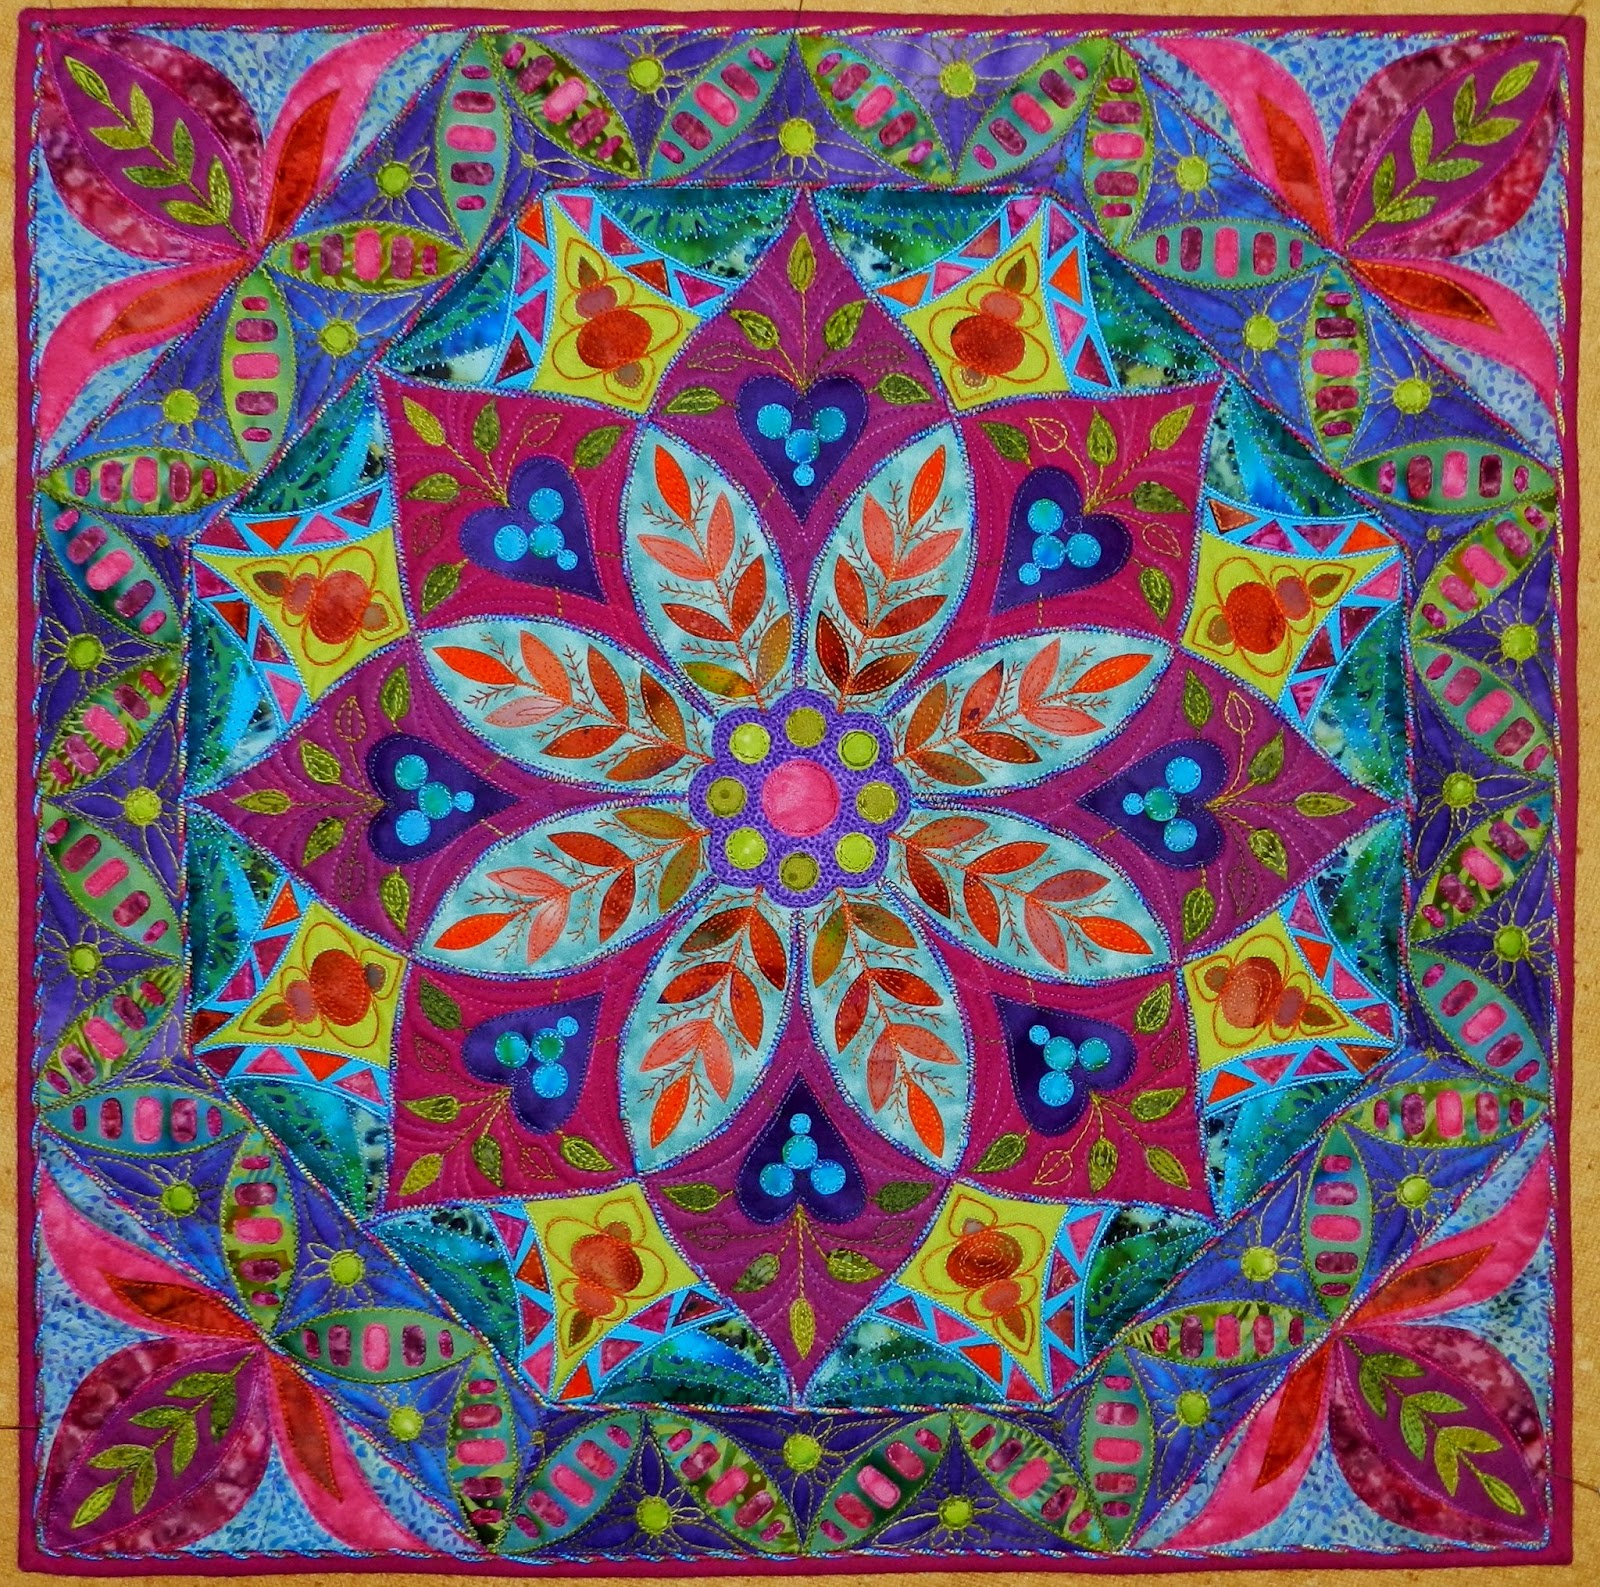
I promised some time ago to tell you about the Mandala which I made.  I don't know when last I enjoyed making a quilt so much as I did for this particular piece...!

I had that feeling of "full circle" as it reminded me so much of my early years as a quilter, the entire design process.   A big sheet of paper, pencils, compass, protractor, ruler and an eraser....!   Yes, I erased many lines which did not work.   And all the way I had this excited smile on my dial, it was pure joy to create this piece and I remembered many years ago how limited my design skills were, the tentative attempts....    How difficult it was then and how easy it has become...   I feel so blessed that Willem gave me the space and means to develop my creativity as through this journey, I found the real me...

In 2013 I applied to become a member of Fibreworks, a renowned group of fibre artists in South Africa and was so excited when I was accepted into their prestigious ranks.    With it however, came added work to an already busy schedule.  I believe that when one commits to something, one has to participate.    Luckily there was  no theme or major size restrictions, so I could create a piece which would relate to where I am at the moment.   I decided to explore Mandalas...

It took me almost a week to complete the design while the eraser did daily sessions!    I find that it takes some time to design, I cannot rush the process...   I would add lines and curves, walk away and do some chores, come back, stare at it....   Any way, it was wonderful to finally choose a colour palette, fabrics and to start cutting...    Some of the pieces were really minute.   I found solid fabrics as well as hand dyed fabrics worked particularly well in this type of design, I added some Bali fabrics which I could not resist...!    I finally finished cutting and fusing and put the piece on the design wall and took a photograph.   I downloaded it onto the computer and immediately saw problems...  Quite amazing how this particular process helped sort out visual problems.   Any way, I had to re-cut certain sections, re-fused and took more photographs and this time I was satisfied...

Unity from Within 201455cm x 55cm
Unity from Within was fused onto a foundation piece, raw edges butting.  Feathered stitch, a decorative stitch on my sewing machine was used on a few areas, others were partially stitched with raw edge applique technique and other raw edges were sealed using a couching technique.   Cords were also used to add definition to certain lines.    Additional detail was quilted into the design using variegated quilting threads. Some pieces were really very small, each little piece on the mandala was cut out individually using small embroidery scissors, my main cutting tool.   It was amazing to see how the stitching transformed the piece.  

Detail Centre Section
Detail can be seen which was quilted into the design e.g. tiny leaves between the burnt orange leaves as well as additional leaves on the magenta sections.

Corner Section
Additional detail added around the lime green spots with the quilting process e.g. on the purple and blue sections.

Unity from Within was part of the Fibreworks VIII Exhibition at the IQCA in July 2014 in Johannesburg.   It will be seen at other venues as well.

I really enjoyed the process so much and decided to work on a concept for a workshop on Mandalas.  This workshop will be during the annual Spring Show of the Dias Quilters' Guild, Port Elizabeth in October 2014, date to be finalized.

Sunday, 20 July 2014

Quiver

I really haven't had time to write a post as I was working on a commitment which swallowed all my free time...   Luckily for me, that is now done and dusted and I can settle down in my usual routine and already ideas for new projects are swirling around......

I did however finish two pieces for Fibreworks VIII and Major Minors V as part of the Fibreworks exhibition which opens at IQCA in Johannesburg this coming week.  

I have previously mentioned that Willem and I love travelling around our beautiful country.   Two years ago we went to Namibia on holiday and the trip also included a section of the Northern Cape.    We were so taken with the Northern Cape that we went back last year to explore more.....   I was so enthralled by the quiver trees, the first time I saw them close up was in Namibia and I took photographs where ever I saw them...  The trees are so completely different to the beautiful and lush indigenous forest of Knysna where I grew up.     As always, I was fascinated by the variety of patterns on the bark of these trees which offers endless scope for fibre art interpretations..!

A flowering Quiver Tree at Canon Road House en route to lookout area of Fish River Canyon, Namibia

When the brief came for the Fibreworks exhibitions, I immediately thought that using the quiver tree idea would be perfect for the Major Minors exhibition as the dimensions was only 25cm x 25cm.   Also, I would be able to manage with my other commitment....    I chose one photograph to work from, cropped the image and had a colour print made from which I worked....


Section of a Quiver Tree

I had bought a selection of chiffon, organza and pongee lining, but it can be rather difficult as the right colours and shades are not always available for a specific project...  You might wonder about all this synthetic fabric!   The idea was to heat treat the fabric to distort it to recreate the intricate patterns of the bark.   I tore strips off the different fabrics and singed the edges using a candle.   I prefer using this technique to a heat gun as I have more control over the burning, luckily I haven't burnt myself so far.   The smell of certain fabrics burning is rather vile and not recommended for those who are asthmatic.    Any way, I burnt a lot of strips and started to play, keeping an eye on the picture I was working from..... Burning fabric with a candle also slightly changes the colour of the fabric a bit and gives lots of dark to blackish edges which adds to the drama.    

   Quiver 2014

The first step was to place the singed strips onto the foundation fabric, after which it was stitched down with the machine.   Hand embroidery stitching was added for more texture and interest and adding a few beads finished it off.   The edge around the piece was very untidy and needed a brainwave...     I put it to the candle once more and singed the entire outer edge, sealing it this way worked rather well and it looked very effective.   The piece was machine quilted.    As the piece is so small, I decided to give it a short name, so I named it Quiver after the trees....  

Next time I'll tell about the Mandala also on show at IQCA next week....!